Add the Zuzli connector to ChatGPT, install the planning skill, and start your first chat — step by step.
About 2 minutes and you’re ready for Zuzli
Part 1 · Enable developer mode in ChatGPT
- 1
Open ChatGPT on desktop
These settings are available in the browser or desktop app.
- 2
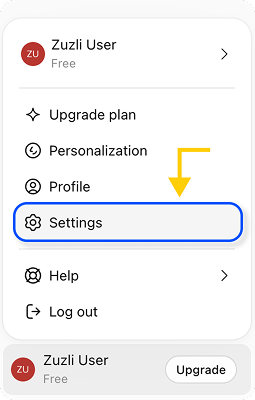
Go to Settings
Click your avatar, then Settings.
- 3
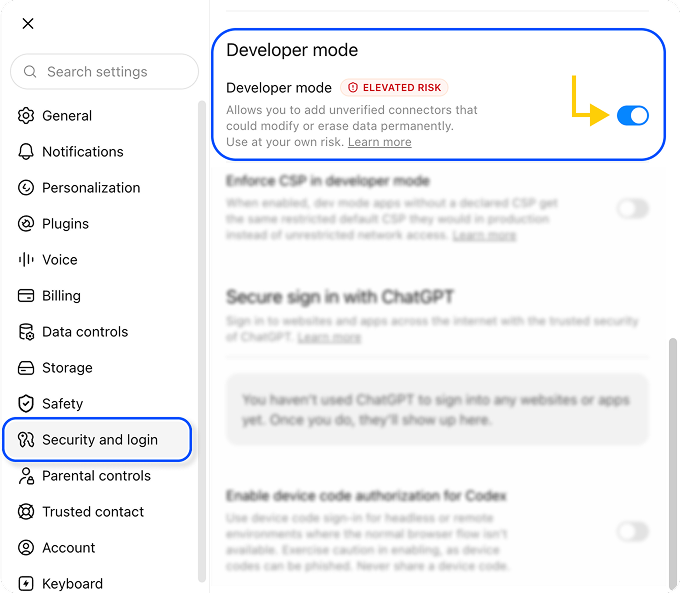
Open Security and login
In the settings sidebar.
- 4
Turn on Developer mode
Scroll to Developer mode and flip the toggle on. This is what allows adding a custom MCP server.
Part 2 · Add the Zuzli connector
- 1
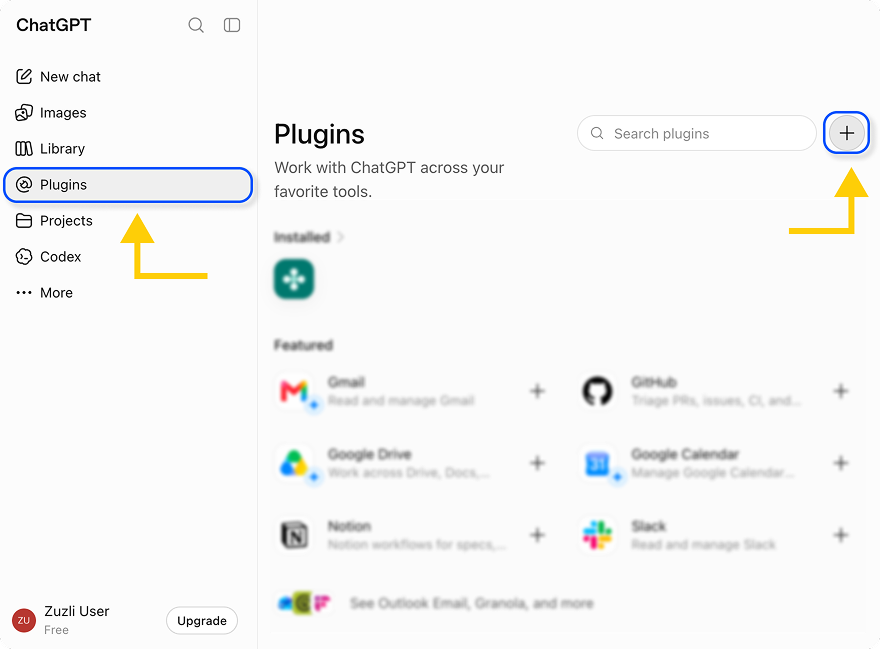
Go to the Plugins tab
Click the + button now available at the edge of the screen to add a connector manually.
- 2
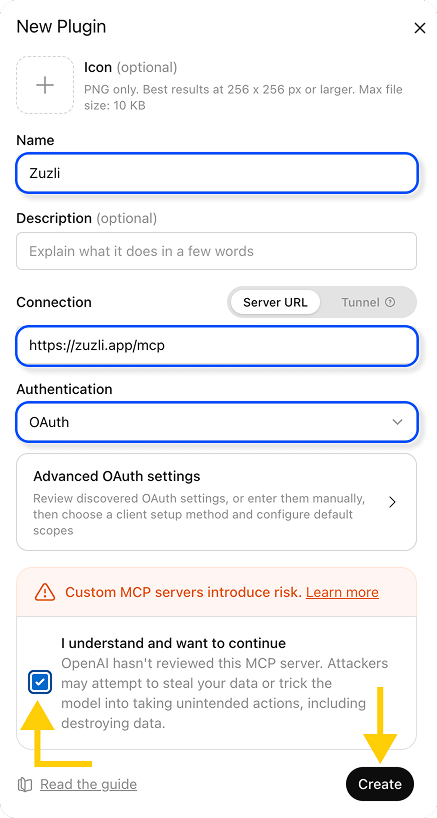
Fill in the MCP server details
Server name:
Server URL:
Leave Authentication on OAuth.
And don’t forget to check the risk acknowledgement below — it’s only there because this is Dev mode. Later we’ll ship from the OpenAI plugin store and you won’t need all these scary warnings :-)
Click Create to continue.
- 3
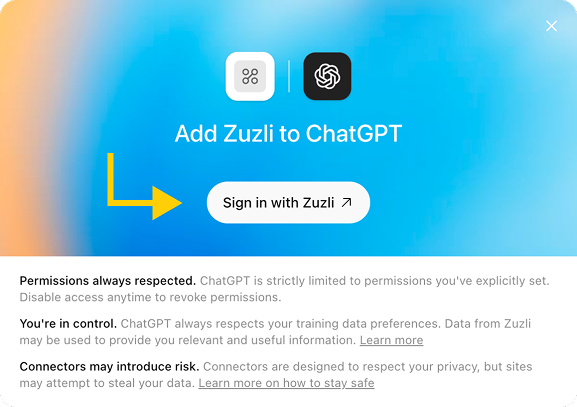
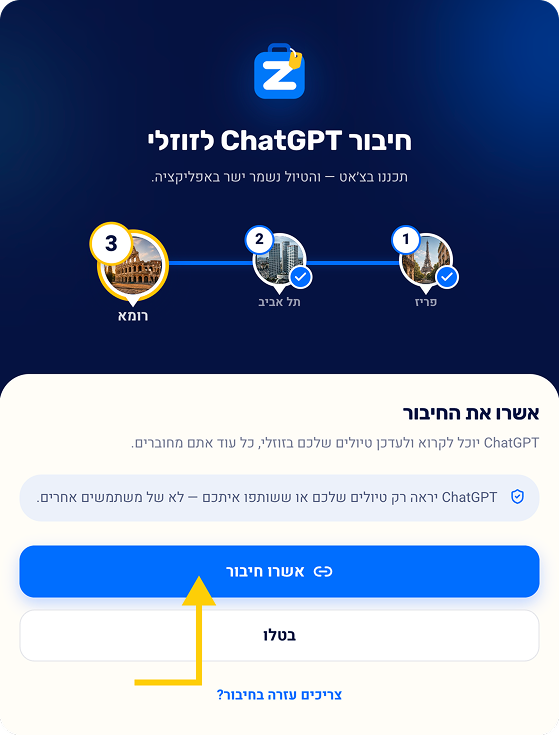
Sign in to Zuzli
A Zuzli sign-in window opens. Approve access and Zuzli appears in your connector list.
Part 3 · Install the Zuzli planning skill
The connector lets ChatGPT read and update trips. The skill teaches it to plan the Zuzli way: in Hebrew, in geographic order, with realistic timing, tips and real content for every stop. We recommend installing both.
- 1
Download the file
Save plan-with-zuzli.zip to your computer. Do not unzip it.
- 2
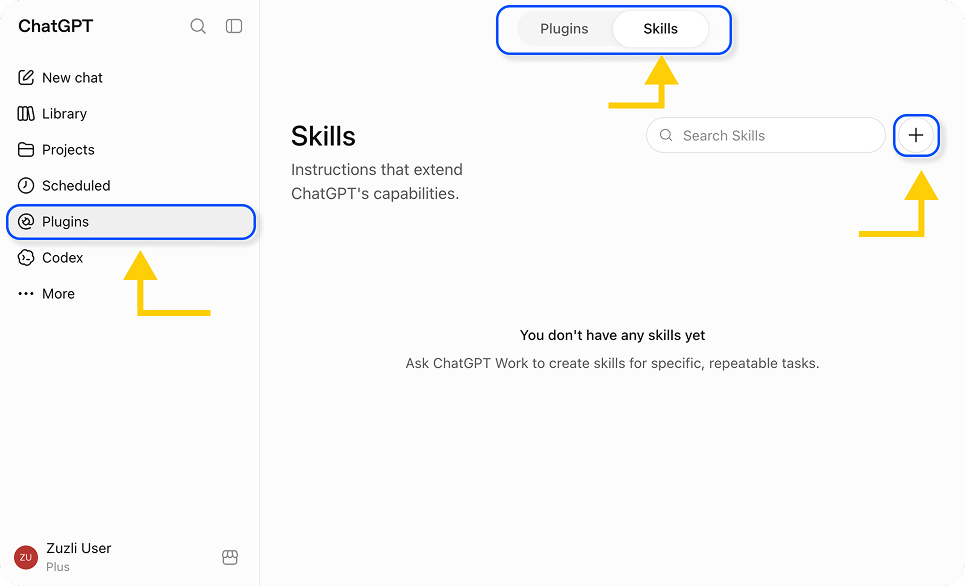
Go to the Skills screen
On the Plugins screen, open the Skills tab and click the add button on the right.
Note: at this stage a Pro account (or higher) is required to add skills manually. Once Zuzli is available from the plugin store, full use including skills will work from a free account as well.
- 3
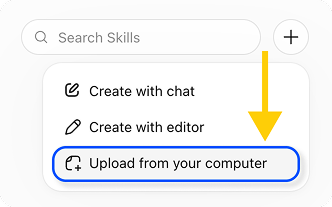
Upload the ZIP
Choose Upload from your computer, then pick the Zip file you just downloaded. After the upload finishes and a green check appears, close the dialog to return to the Skills screen.
- 4
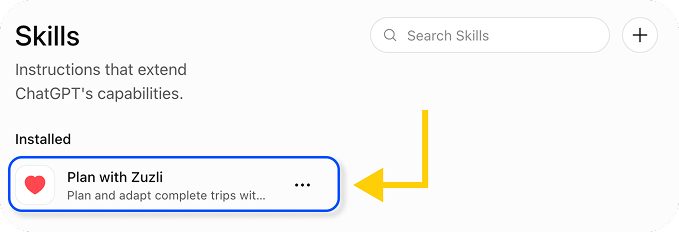
Confirm it is installed
plan-with-zuzli appears in the installed skills list.
Part 4 · Your first chat
- 1
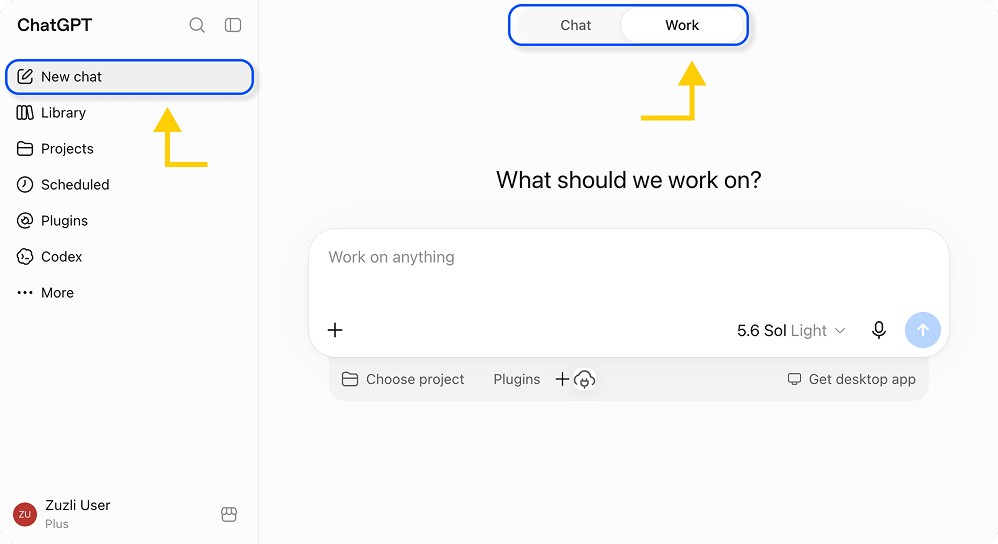
Open a new chat under Work
The chat must be in Work mode, not a regular chat, to use the skill we added. Once we ship from the official plugin store, regular chat will work too — including without a Pro account.
- 2
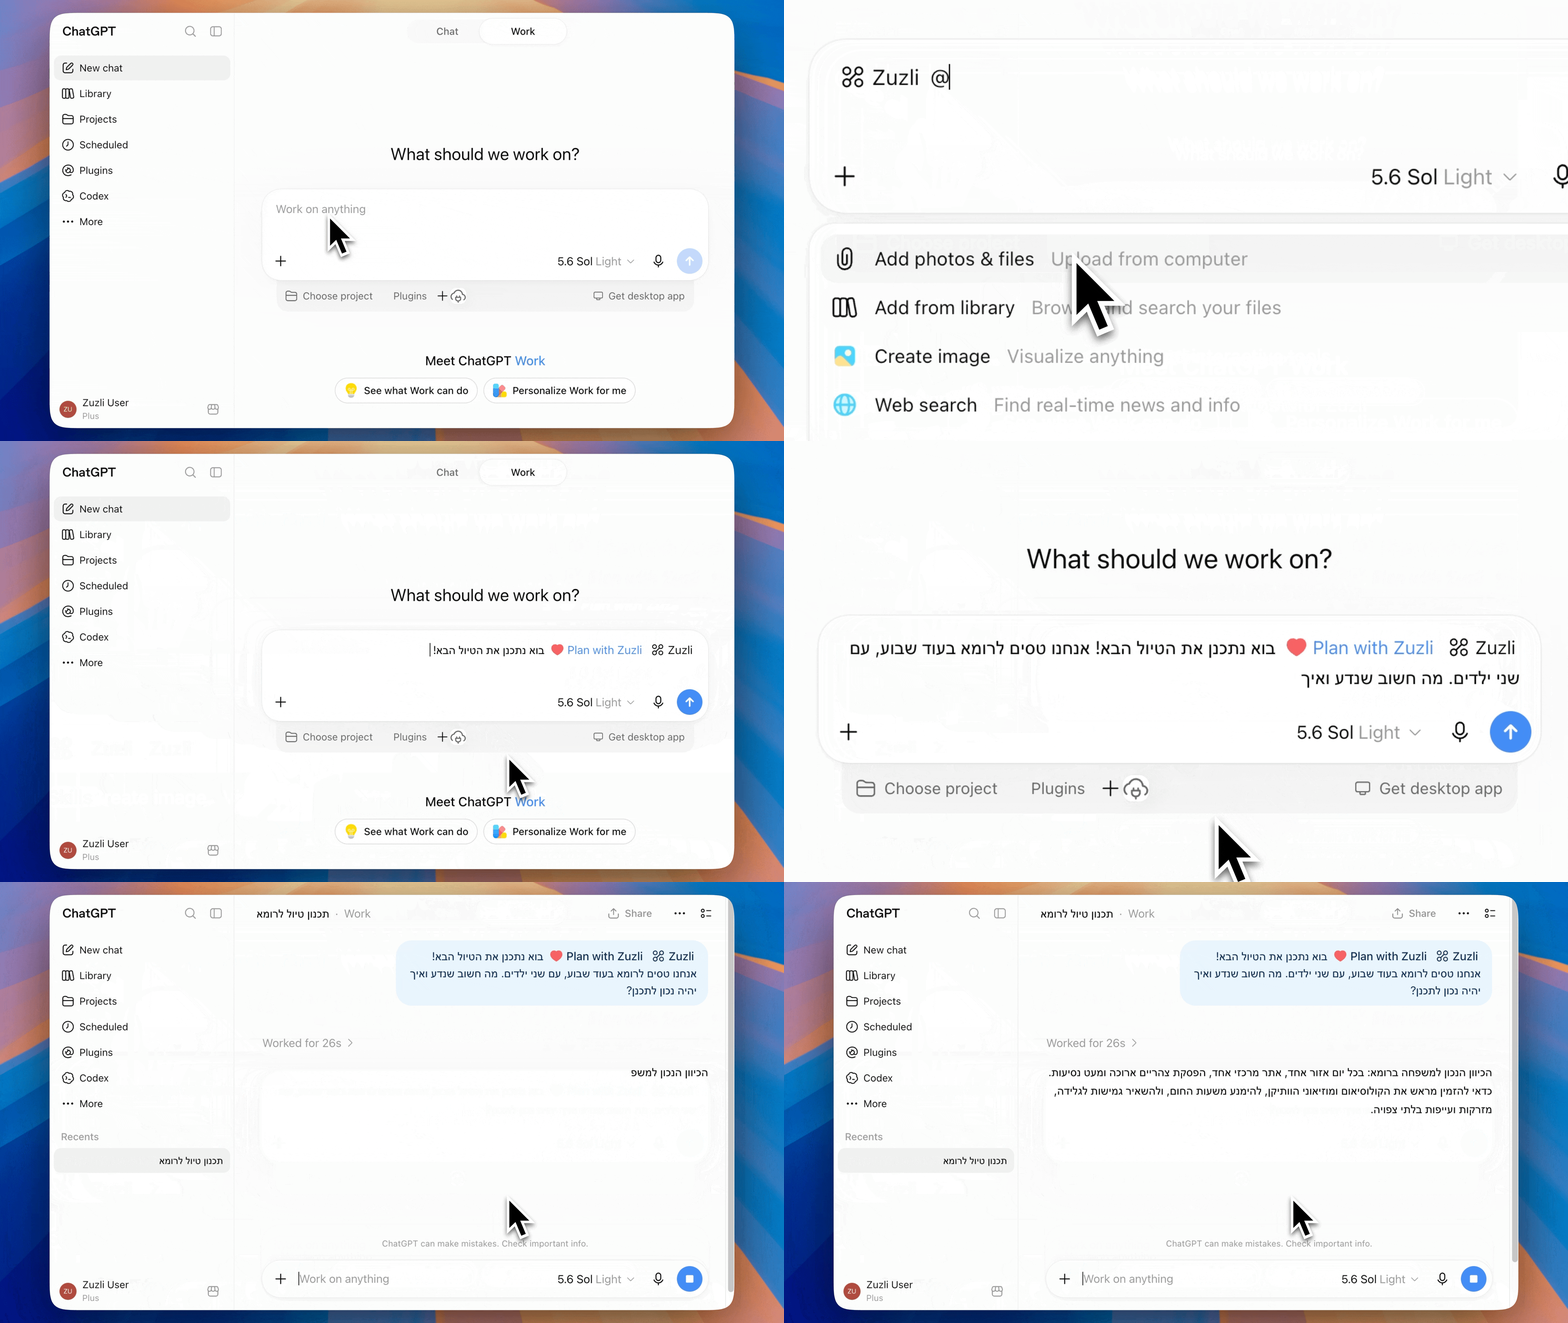
Prepare the prompt
To talk with Zuzli, start the chat by connecting the plugin — type:
Then pick the plugin from the list that appears.
Right after that, add the Skill the same way — type:
and select the Skill.
- 3
Now plan the trip!
Right after adding the plugin and the skill, you can continue and plan your first trip. For example:
- 4
And you’re ready for Zuzli!
Zuzli will ask relevant questions and build a full trip straight into the app. You can always continue in the same Work chat or open a new one, ask about your trips, and make changes in real time.
Contact us
For questions, technical issues, privacy requests or account deletion, email us directly: